


LATEST NEWS BY NEWTOP
LATEST NEWS BY NEWTOP
Removing the Starter Assembly
1. Remove the side cover. Remove the screws and clip that secure the side cover. The starter assembly is attached to the cover.
2. Remove the starter assembly screw. The starter assembly is held together on most saws with one screw. Remove it and set it aside.
3. Remove the starter dogs. Remove the starter dogs from the assembly.If your saw has a soft-start spring, remove it as well.
4. Remove the rope and pulley. Untie the knot in the rope and remove it from the pulley. Then you can remove the pulley from the assembly.
Diagnosing the Problem
1. Inspect the pulley. Check the pulley for cracks and breaks. The back side of the pulley can break off, causing the starter assembly to fail.
2. Inspect the spring. The spring can break in the housing, which will cause the assembly to fail. The most common place the spring breaks is at the end, where you can see it through the housing assembly.
Reassembling the Starter Assembly
Caution: Once you put tension on the pulley, do not let it go. It can spin and cut you or pop out of the assembly, which will result in the spring flying out of the starter.
1. Replace the pulley. Set the pulley on top of the starter spring, and make sure it meshes.
2. Wind the pulley. Now you can begin winding the pulley. The trick here is to think about how the rope will recoil into the starter assembly. Then just wind the pulley so that it will pull the rope into the starter. Four or five complete rotations will set the right amount of tension.
3. Attach the rope. You may find this step is easier with another person to help thread the rope or hold the pulley, but it can be done alone with a bit of maneuvering. Line up the hole on the pulley with the hole on the starter housing. Thread the rope through both holes and tie a knot in the end of it. Then tuck it out of the way.
4. Install the starter dogs. Replace the soft-start spring if your saw has one. Set the starter dogs back into place and tighten the assembly screw.
5. Coil the rope
Slowly let the rope back into the starter assembly.
6. Reattach the cover. Now just reattach the cover and tighten the screws or clips to finalize the repair.
Conclusion
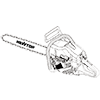
Repairing the starter on your chainsaw is a simple repair that will save you a lot of money compared to a repair shop. With the right parts and about 15 minutes, you can get your saw running again.
Remember to use our lawn equipment parts finder to find the OEM parts for your chainsaw and other yard tools.
Expert in garden and agricultural machines